Mastering Tradition – Grandma’s No-Fail Pie Crust Unveiled!
Step into the enchanting realm of baking where the golden crust of a pie is not just a canvas for the filling but a testament to tradition and mastery. Today, we unlock the treasure trove of Grandma’s No-Fail Pie Crust, a timeless recipe that has graced family gatherings and celebrations for generations. Join us on a journey where simple ingredients metamorphose into a flaky masterpiece that embodies the essence of homemade goodness.
Ingredients:
- 4 cups all-purpose flour
- 1 ¾ cups shortening
- ½ cup water
- 3 tablespoons white sugar
- 1 egg
- 2 teaspoons salt
Instructions:
Step 1: Flour Fusion
- Blend and Chill: In a large mixing bowl, combine the all-purpose flour and shortening. Using a pastry cutter or your fingertips, blend the mixture until it resembles coarse crumbs.
- Chill Out: Place the bowl in the refrigerator for at least 30 minutes. This chill time allows the fat (shortening) to solidify, ensuring a flaky texture in the final crust.
Step 2: Liquid Alchemy
- Whisk and Sweeten: In a separate bowl, whisk together water, white sugar, egg, and salt. The sugar adds a subtle sweetness, and the egg contributes to the crust’s structure.
Step 3: Harmony Unleashed
- Bring It Together: Retrieve the chilled flour and shortening mixture. Pour the liquid mixture over it, stirring gently with a fork until the dough comes together.
- Form and Divide: Divide the dough into two equal portions. This recipe yields two crusts, perfect for a double-crust pie or two single-crust pies.
Step 4: Rolling Elegance
- Flour and Roll: On a lightly floured surface, roll out each portion of dough into a circle that fits your pie dish. Aim for about 1/8-inch thickness.
Step 5: Crust Conquest
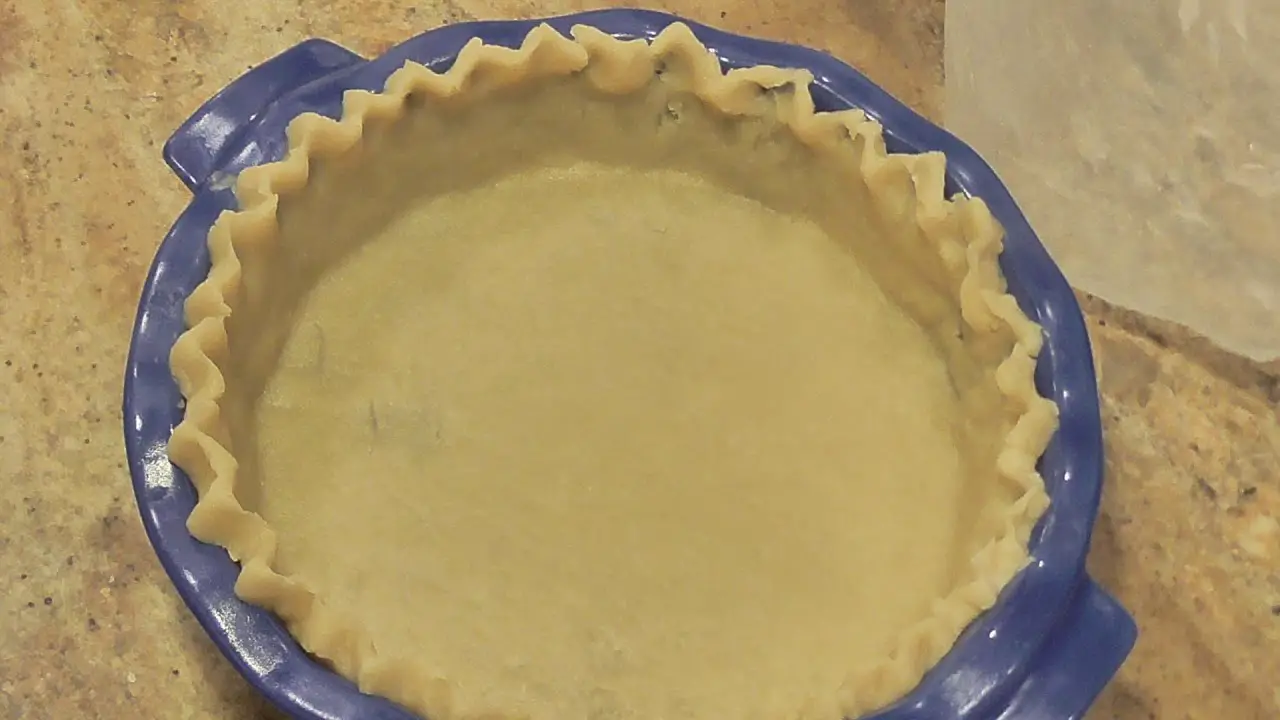
- Transfer and Trim: Carefully transfer one rolled-out crust to the pie dish, gently pressing it against the bottom and sides. Trim any excess overhang with a sharp knife.
Step 6: Pastry Finesse
- Design and Dock: For a decorative edge, use your fingers or a fork to crimp the edges of the crust. Dock the crust by poking the bottom with a fork to prevent air bubbles during baking.
Step 7: Bake or Fill
- Pre-Bake or Fill and Top: Depending on your recipe, you can pre-bake the crust (blind baking) for certain fillings or proceed to fill it right away. For a double-crust pie, repeat the process with the second portion of dough.
Cook Notes:
- Chilled Success: Ensure the shortening is cold and firm when blending with flour. A cold environment helps maintain the desired flakiness.
- Handle with Care: Be gentle when combining the wet and dry ingredients. Overmixing can lead to a tougher crust.
Variations:
Sweet Symphony:
- Sweet Spice Infusion: Add a teaspoon of cinnamon or nutmeg to the dry ingredients for a sweet, spiced undertone.
Nutty Elegance:
- Almond or Pecan Flour Twist: Replace a portion of the all-purpose flour with almond or pecan flour for a nutty, flavorful crust.
Keto Versions:
- Almond Flour Alchemy: Substitute all-purpose flour with almond flour for a keto-friendly alternative. Adjust the water quantity accordingly.
- Butter Brilliance: Swap shortening with unsalted butter for a rich, buttery keto crust.
Low Carb Version:
- Coconut Flour Transformation: Introduce coconut flour for a lower-carb option. Note that coconut flour is absorbent, so adjust the liquid accordingly.
- Erythritol Elegance: Replace white sugar with a low-carb sweetener like erythritol.
In conclusion, Grandma’s No-Fail Pie Crust isn’t just a recipe; it’s a legacy of love and tradition. As you embark on your pie-making journey, may the aroma of freshly baked crusts transport you to the cherished moments of family gatherings and shared meals. Whether you follow the classic recipe or explore variations to suit your taste and dietary preferences, the art of crafting the perfect pie crust is a culinary adventure worth savoring. So, gather your ingredients, dust off the rolling pin, and let the timeless magic of Grandma’s pie crust become a staple in your own culinary repertoire


