Introduction:
Indulge in the refreshing and nostalgic flavors of an Orange Creamsicle with this delightful No-Bake Orange Creamsicle Cheesecake. This creamy and tangy dessert combines the bright citrusy notes of oranges with the smooth richness of cheesecake, all without turning on the oven. In this blog post, we will guide you through the step-by-step process of creating this luscious treat, along with some helpful tips to ensure your cheesecake turns out perfectly creamy and full of citrusy goodness.
Ingredients:
For the Crust:
– 1 ½ cups graham cracker crumbs
– ¼ cup granulated sugar
– ½ cup unsalted butter, melted
For the Filling:
– 16 ounces cream cheese, softened
– ½ cup powdered sugar
– 1 tablespoon orange zest
– 1 teaspoon vanilla extract
– 2 cups heavy cream, chilled
– ½ cup orange juice
– Orange food coloring (optional)
For the Topping:
– Whipped cream
– Orange slices or zest for garnish (optional)
Step-by-Step Instructions:


1. Preparing the Crust:
a. In a medium bowl, combine graham cracker crumbs, granulated sugar, and melted butter. Mix until the mixture resembles wet sand.
b. Press the crust mixture evenly into the bottom of a 9-inch springform pan or a pie dish. Use the back of a spoon or the bottom of a glass to firmly pack the crust.
c. Place the crust in the refrigerator to chill while you prepare the filling.
2. Making the Filling:
a. In a large bowl, beat the softened cream cheese until smooth and creamy.
b. Add the powdered sugar, orange zest, and vanilla extract to the cream cheese. Mix until well combined and smooth.
c. In a separate bowl, whip the heavy cream until stiff peaks form.
d. Gently fold the whipped cream into the cream cheese mixture until fully incorporated.
e. Add the orange juice and a few drops of orange food coloring (if desired) to the mixture. Stir until evenly combined and the color is vibrant.
3. Assembling the Cheesecake:
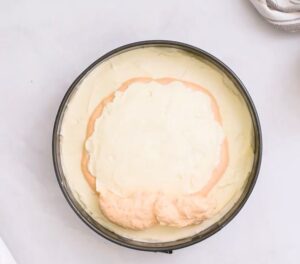
a. Pour the creamy filling over the chilled crust, spreading it evenly with a spatula.
b. Smooth the top of the cheesecake with the spatula or the back of a spoon.
c. Cover the cheesecake with plastic wrap and refrigerate for at least 4 hours or overnight to set.
4. Serving the Cheesecake:
a. Once the cheesecake is set, remove it from the refrigerator.
b. Carefully release the springform pan or, if using a pie dish, serve directly from the dish.
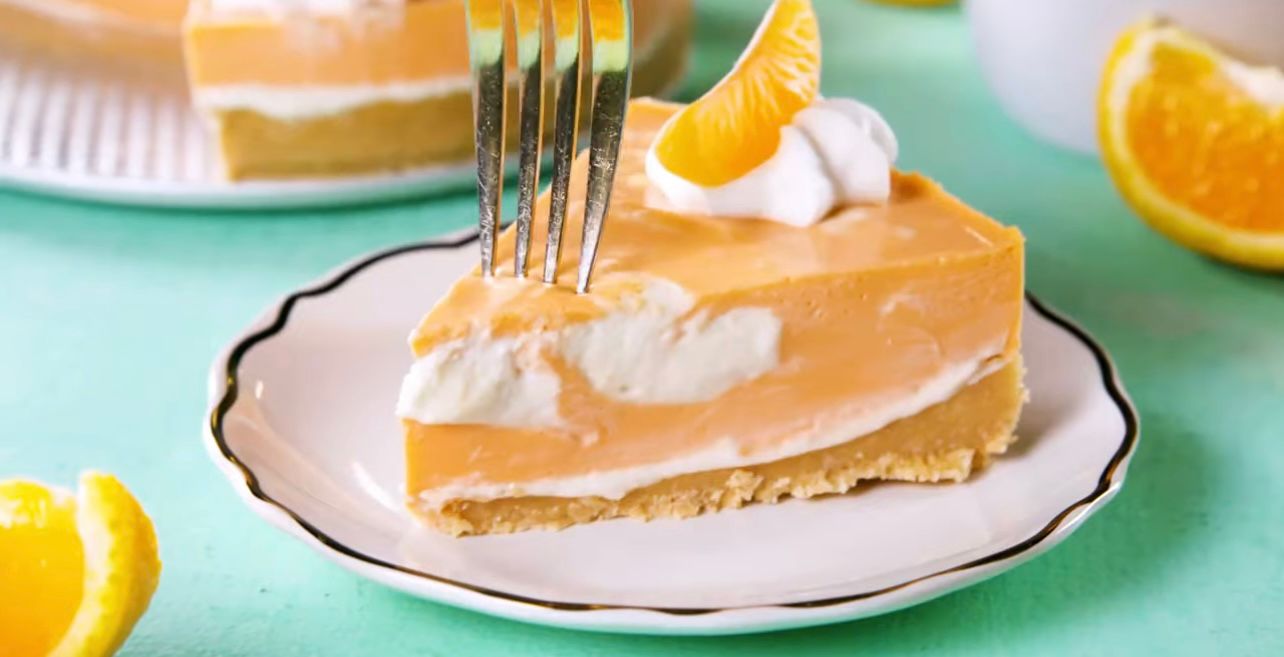
c. Pipe or spread whipped cream on top of the cheesecake.
d. Garnish with orange slices or zest for an extra pop of citrusy flavor and visual appeal.
Tips:
– To make it even more reminiscent of the classic creamsicle, consider adding a layer of crushed vanilla wafers or shortbread cookies on top of the crust before adding the filling.
– For a stronger orange flavor, you can add a few drops of orange extract or orange liqueur to the filling mixture.
– If you don’t have orange food coloring, the cheesecake will still have a beautiful creamy color without it.
– Ensure the cream cheese is softened to room temperature to achieve a smooth and creamy texture.
– When folding the whipped cream into the cream cheese mixture, do it gently to avoid deflating the air whipped into the cream.

Conclusion:
No-Bake Orange Creamsicle Cheesecake offers a delightful blend of creamy, tangy, and citrusy flavors that will transport you back to childhood memories. With its smooth and luscious texture, this easy-to-make dessert is perfect for any occasion. By following the step-by-step instructions and incorporating the suggested tips, you can create a show-stopping dessert that will impress your guests and leave them craving more. So, gather the ingredients, chill the fridge, and enjoy every tangy and creamy bite of this irresistible Orange Creamsicle Cheesecake!