Pasta e Piselli: A Classic Italian Dish Perfect for Comforting Meals
Introduction
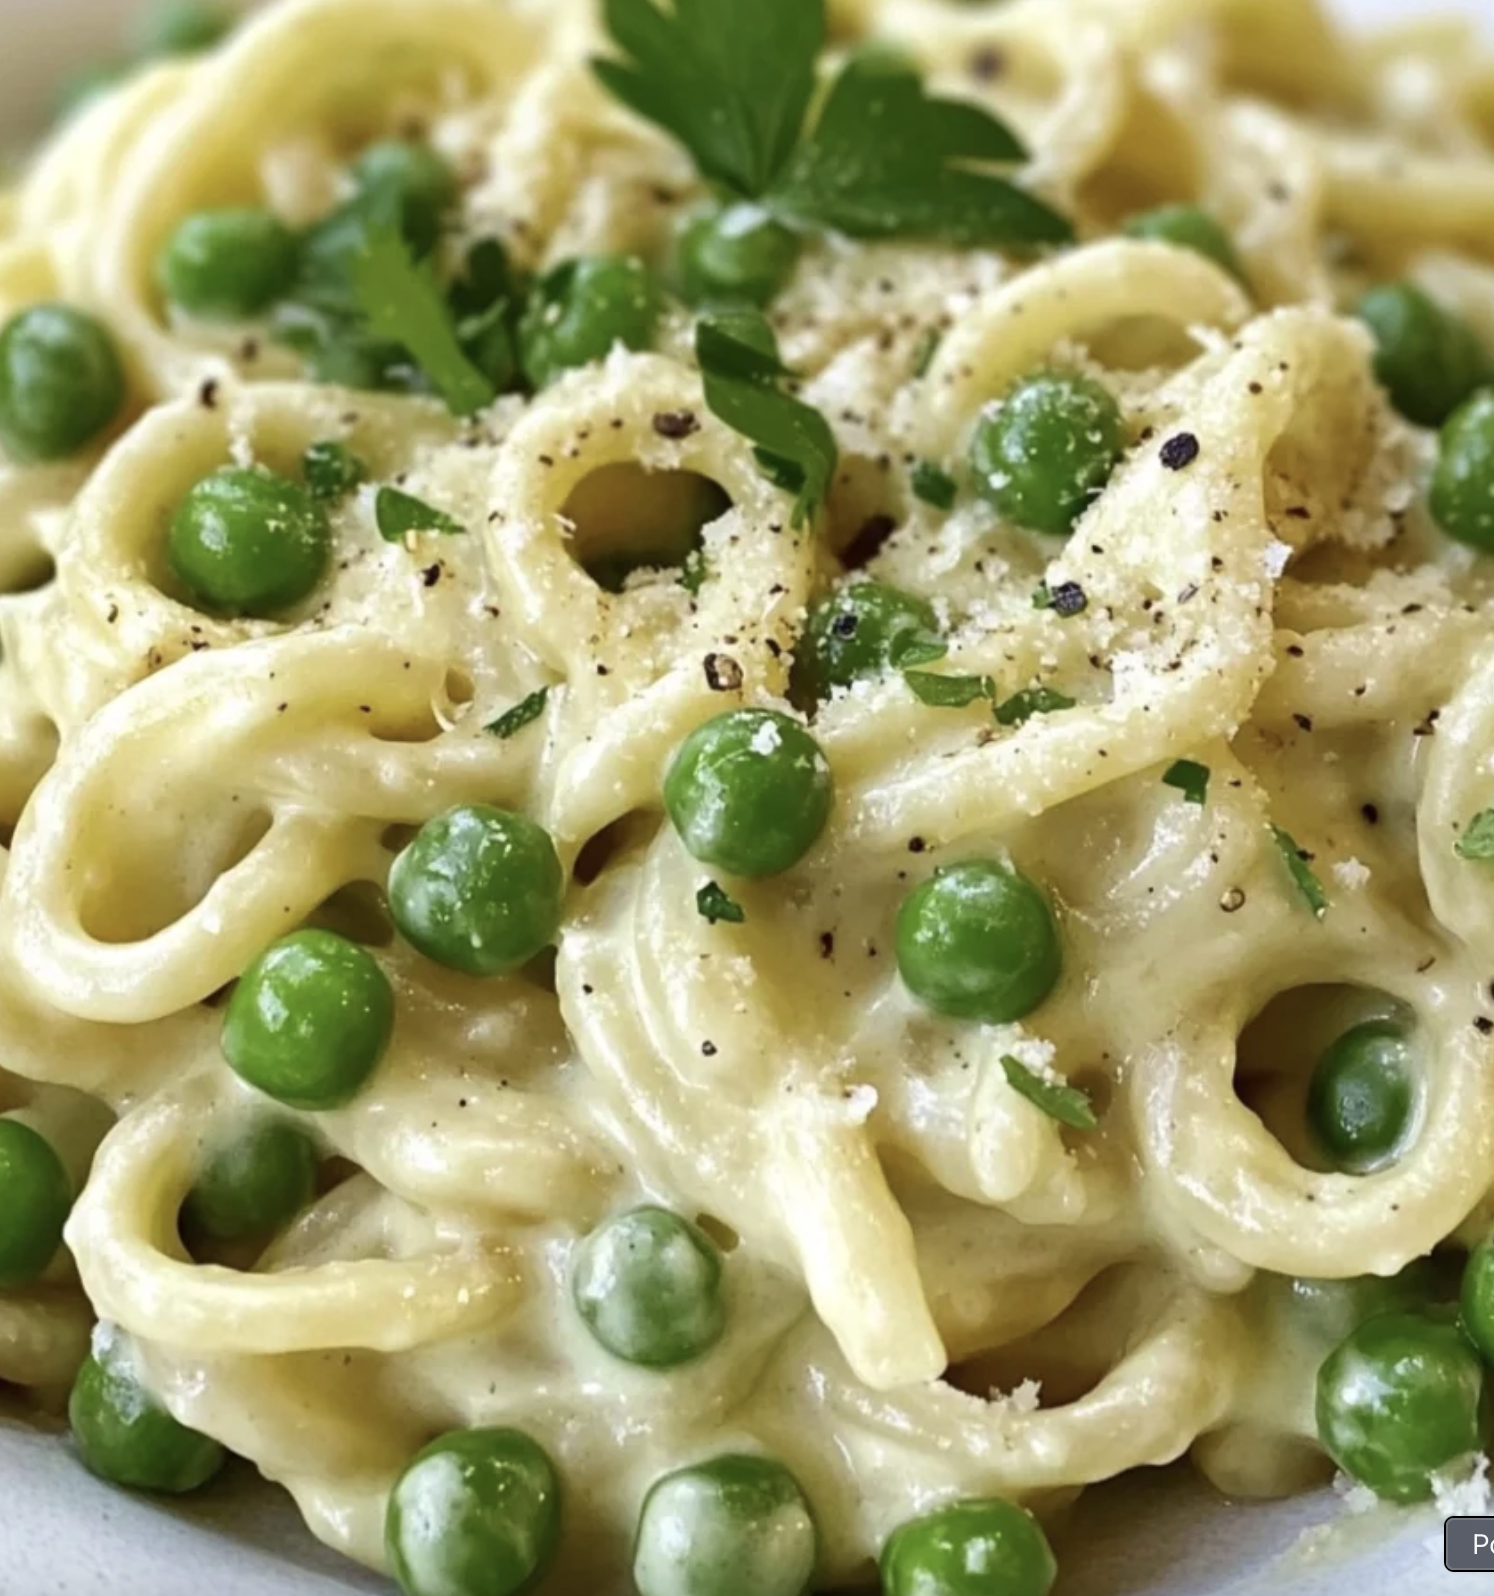
Pasta e Piselli, also known as Pasta with Peas, is a classic Italian dish that combines the simplicity of pasta with the freshness of peas. This comforting and flavorful dish is a staple in Italian cuisine, loved by both kids and adults. With its vibrant colors and delicious taste, Pasta e Piselli is the perfect choice for a quick and satisfying meal.
In this article, we will explore the traditional recipe for Pasta e Piselli, along with some variations and tips to make it even more delectable. Whether you’re a seasoned cook or a beginner in the kitchen, this recipe will guide you through the steps to create a mouthwatering dish that will impress your family and friends.
Ingredients
For the Pasta e Piselli:
- 2 cups dried pasta (such as penne, fusilli, or farfalle)
- 1 cup fresh or frozen peas
- 1 small onion, finely chopped
- 2 cloves of garlic, minced
- 2 tablespoons olive oil
- 1 cup vegetable or chicken broth
- 1/2 cup grated Parmesan cheese
- Salt and pepper to taste
Optional Garnishes:
- Freshly chopped parsley
- Extra grated Parmesan cheese
Steps
Step 1: Prepare the Ingredients
Start by preparing all the ingredients for the Pasta e Piselli. Chop the onion, mince the garlic, and grate the Parmesan cheese if needed. If you’re using fresh peas, shell them and set aside. If using frozen peas, thaw them according to the package instructions.
Step 2: Cook the Pasta
Bring a large pot of salted water to a boil. Add the pasta and cook according to the package instructions until al dente. Drain the pasta, reserving about 1/2 cup of the cooking water.
Step 3: Sauté the Onion and Garlic
In a large skillet, heat the olive oil over medium heat. Add the chopped onion and minced garlic, and sauté until they become translucent and fragrant, about 3-4 minutes.
Step 4: Add the Peas
Add the peas to the skillet and cook for an additional 2-3 minutes, stirring occasionally. If using fresh peas, cook them until they become tender. If using frozen peas, cook them until heated through.
Step 5: Combine the Pasta and Peas
Add the cooked pasta to the skillet with the peas. Toss everything together, ensuring the pasta and peas are well combined.
Step 6: Add the Broth and Parmesan Cheese
Pour the vegetable or chicken broth into the skillet, stirring well to coat the pasta and peas. Allow the mixture to simmer for a few minutes, allowing the flavors to meld together. Sprinkle the grated Parmesan cheese over the top and stir until the cheese melts and creates a creamy sauce.
Step 7: Season and Serve
Taste the Pasta e Piselli and season with salt and pepper according to your preference. If the dish seems dry, add some of the reserved pasta cooking water to loosen the sauce. Serve the Pasta e Piselli hot, garnished with freshly chopped parsley and extra grated Parmesan cheese if desired.
Variations
While the traditional Pasta e Piselli recipe is delicious on its own, you can also experiment with some variations to suit your taste:
1. Protein Boost:
Add cooked chicken, bacon, or pancetta to the dish for an extra protein kick. Sauté the protein of your choice along with the onion and garlic.
2. Creamy Twist:
If you prefer a creamier texture, stir in a couple of tablespoons of heavy cream or cream cheese at the end of cooking. This will give the dish a velvety finish.
3. Herbaceous Delight:
Enhance the flavors by adding fresh herbs such as basil, mint, or thyme. Chop the herbs finely and sprinkle them over the finished dish for a burst of freshness.
Tips
Here are some helpful tips to ensure your Pasta e Piselli turns out perfect every time:
1. Don’t Overcook the Peas:
If using fresh peas, be careful not to overcook them as they can become mushy. Cook them just until tender. Frozen peas only need a few minutes to heat through.
2. Reserve Pasta Water:
Save some of the pasta cooking water to add to the dish if it appears too dry. The starchy water helps create a silky sauce that coats the pasta beautifully.
3. Experiment with Pasta Shapes:
While penne, fusilli, and farfalle are commonly used in Pasta e Piselli, feel free to try different pasta shapes to add variety and visual appeal to your dish.
4. Adjust Seasonings:
Season the dish with salt and pepper according to your taste. Remember, the Parmesan cheese adds saltiness, so adjust the seasoning accordingly.
5. Fresh vs. Frozen Peas:
While fresh peas have a sweeter taste and a slight crunch, frozen peas are convenient and available year-round. Choose whichever option works best for you.
Conclusion
Pasta e Piselli is a delightful Italian dish that brings together the simplicity of pasta and the freshness of peas. With its versatile nature, this recipe can be customized to suit your preferences by adding protein, creaminess, or herbs. The combination of flavors and textures in Pasta e Piselli is sure to satisfy your cravings and impress your guests.
So, next time you’re in the mood for a comforting and delicious meal, give Pasta e Piselli a try. It’s a classic Italian dish that will transport you to the heart of Italy with every bite.
FAQs
1. Can I use canned peas instead of fresh or frozen peas?
While fresh or frozen peas are recommended for the best flavor and texture, you can use canned peas in a pinch. However, note that canned peas tend to be softer and may not provide the same vibrant taste as fresh or frozen peas.
2. Can I use a different type of cheese instead of Parmesan?
Parmesan cheese adds a distinct nutty and salty flavor to the dish. However, you can experiment with other hard cheeses such as Pecorino Romano or Grana Padano if you prefer.
3. Can I make Pasta e Piselli in advance?
Pasta e Piselli is best enjoyed fresh, but you can make it in advance and reheat it later. Store the leftovers in an airtight container in the refrigerator for up to 2 days. Reheat gently on the stovetop or in the microwave, adding a splash of broth or water to loosen the sauce if needed.
4. Can I freeze Pasta e Piselli?
Pasta e Piselli is not suitable for freezing as the texture of the pasta and peas may become mushy upon thawing. It is best to enjoy this dish immediately after cooking.