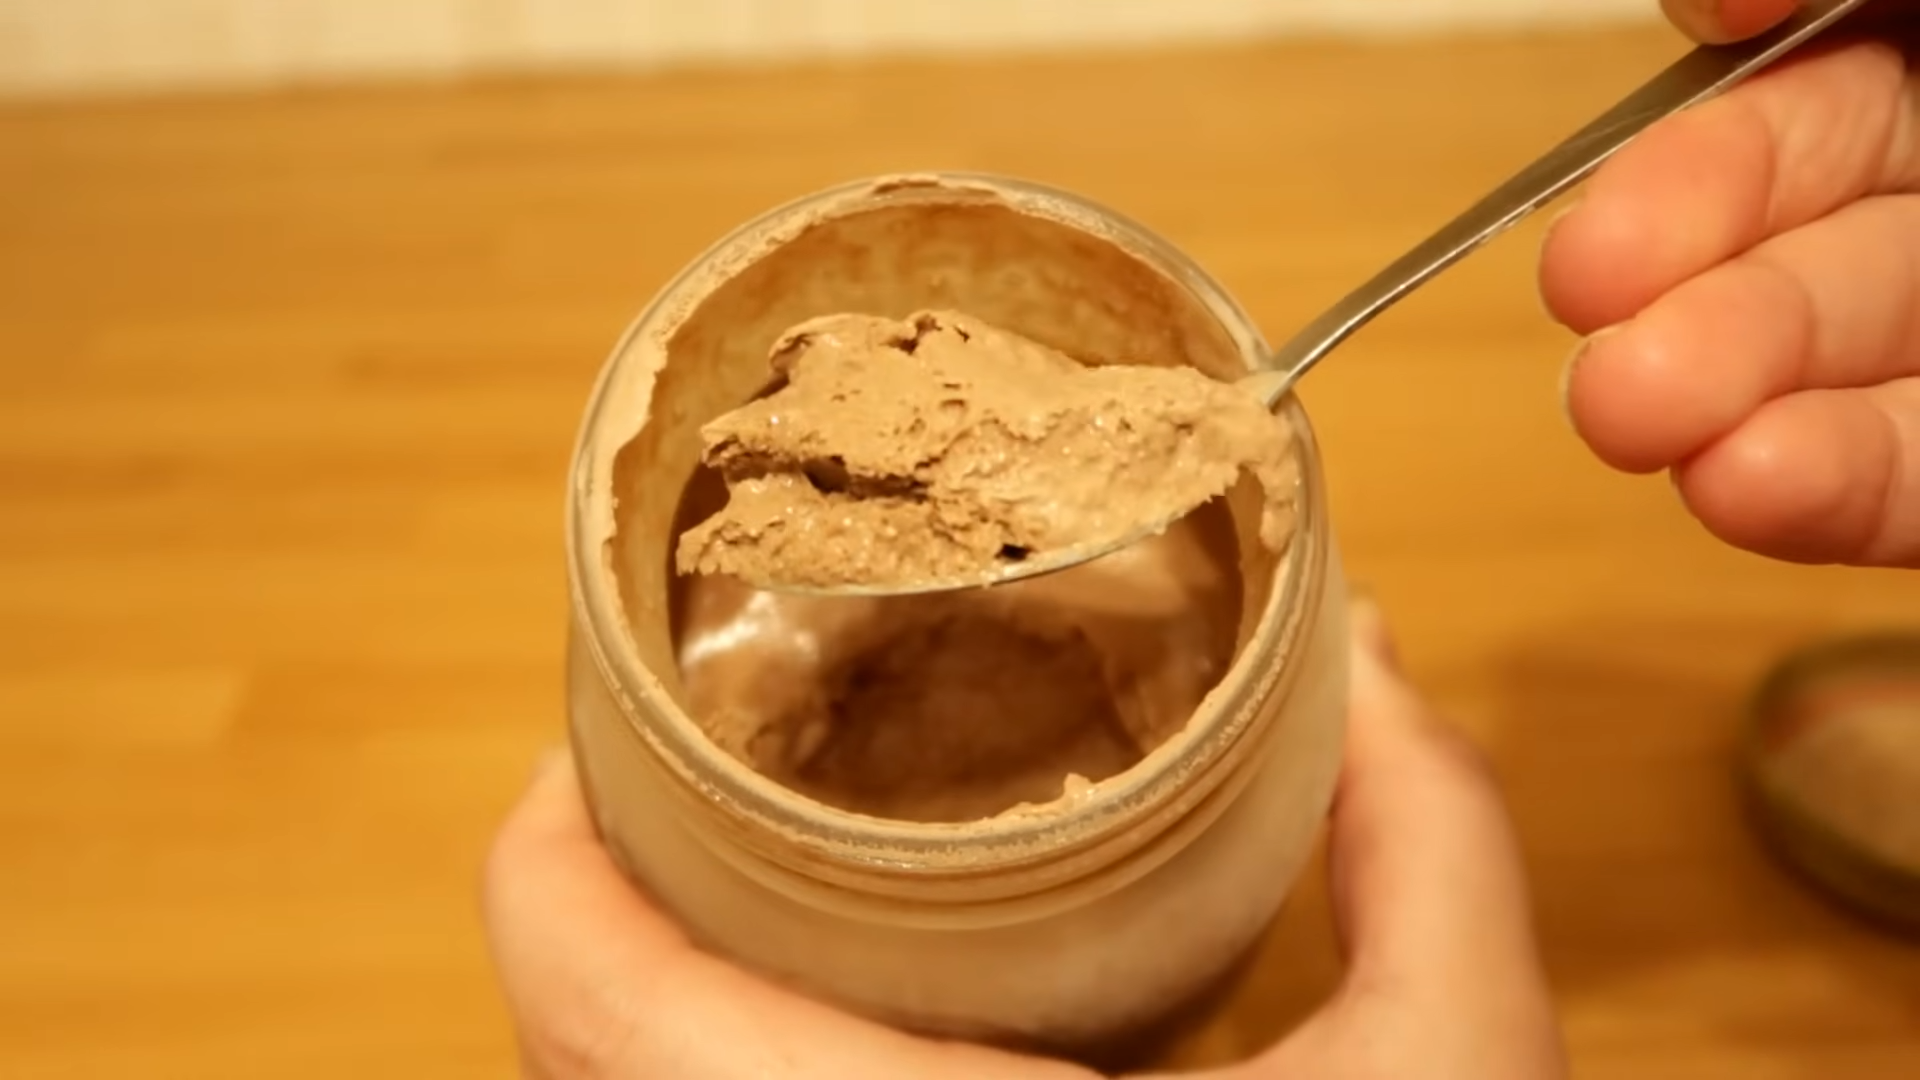
Mason Jar Ice Cream is a fun and easy way to make delicious homemade ice cream without the need for an ice cream maker. This simple method allows you to create creamy and flavorful ice cream right in a mason jar using only a few basic ingredients. The best part is that you can customize the flavors and add your favorite mix-ins to create your own unique frozen treat. Whether you’re looking for a quick dessert or a fun activity with family and friends, Mason Jar Ice Cream is sure to satisfy your sweet cravings. In this recipe, we will guide you through the steps to make your own homemade Mason Jar Ice Cream.
Ingredients:
- 1 cup heavy cream
- 1 cup whole milk
- 1/2 cup granulated sugar
- 1 teaspoon pure vanilla extract
- Pinch of salt
- Ice cubes
- 1/2 cup rock salt (optional)
- Desired mix-ins (chocolate chips, crushed cookies, fruit, etc.)
Instructions:
- Begin by preparing the ingredients and ensuring that the mason jar you’re using is clean and dry.
- In a mixing bowl, combine the heavy cream, whole milk, granulated sugar, vanilla extract, and a pinch of salt. Stir well until the sugar is fully dissolved and the mixture is smooth.
- Pour the ice cream base into a mason jar, leaving some space at the top for expansion during the freezing process.
- Add your desired mix-ins to the jar. Whether you prefer chocolate chips, crushed cookies, or fresh fruit, this is your chance to get creative and customize your ice cream. Stir gently to distribute the mix-ins evenly throughout the mixture.
- Secure the lid tightly on the mason jar to prevent any leaks or spills during the shaking process.
- Fill a larger-sized container, such as a bucket or basin, with ice cubes. If you have rock salt, you can layer it with the ice cubes to help lower the temperature and freeze the ice cream faster. However, the rock salt is optional, and you can still make ice cream using just ice cubes.
- Place the mason jar filled with the ice cream mixture into the ice-filled container. Ensure that the jar is surrounded by ice on all sides.
- Shake the container vigorously for about 10-15 minutes. You can roll, toss, or shake the jar continuously to help freeze the ice cream evenly. The ice cream mixture will gradually thicken and solidify as it comes into contact with the cold temperatures from the ice.
- After 10-15 minutes of shaking, carefully remove the mason jar from the ice-filled container. Wipe off any excess moisture from the jar to prevent water from getting into the ice cream.
- Open the jar and give the ice cream a stir to incorporate any unmixed ingredients and ensure a smooth texture.
- If the ice cream hasn’t reached your desired consistency, you can place the jar back into the ice-filled container and continue shaking for a few more minutes.
- Once the ice cream has reached your desired consistency, you can enjoy it immediately or place it in the freezer for a little while to firm up further.
- Serve the Mason Jar Ice Cream in bowls or cones, and garnish with additional toppings if desired.
Variations and Tips:
- Flavor Variations: The basic recipe allows you to create a classic vanilla ice cream. However, you can experiment with different flavors by adding extracts, spices, or other flavorings. For example, you can infuse the cream and milk with coffee for a rich coffee-flavored ice cream, or add cocoa powder for a chocolate version. Feel free to get creative and customize the flavors to your liking.
- Mix-Ins: When adding mix-ins, consider the texture and size of the ingredients. Smaller mix-ins like mini chocolate chips or finely chopped nuts tend to work best. However, larger pieces, such as cookie chunks or fruit slices, can also be added for a delightful burst of flavor and texture.
- Sweetness Level: The amount of sugar can be adjusted based on your personal preference. You can increase or decrease the sugar quantity to suit your taste. Keep in mind that the ice cream mixture may taste slightly less sweet after freezing, so it’s a good idea to make it slightly sweeter than desired.
- Storage: If you have any leftover Mason Jar Ice Cream, you can store it in the freezer. Transfer the ice cream to an airtight container or cover the mason jar tightly with plastic wrap and a lid. It’s best to consume the ice cream within a few days to maintain its quality and texture.
- Share the Fun: Making Mason Jar Ice Cream can be a fun activity to do with friends or family. Each person can customize their own flavor and mix-ins, and everyone can take turns shaking the jars for a collaborative and enjoyable experience.
Mason Jar IceCream is a delightful homemade frozen treat that requires minimal ingredients and equipment. With a mason jar and a few simple steps, you can create creamy and flavorful ice cream that can be customized to suit your taste preferences. Whether you’re enjoying it solo or sharing the fun with loved ones, Mason Jar Ice Cream is a fantastic way to satisfy your ice cream cravings and indulge in a delicious dessert made with love. So grab a mason jar, gather your favorite ingredients, and start shaking up your own batch of homemade ice cream today!


