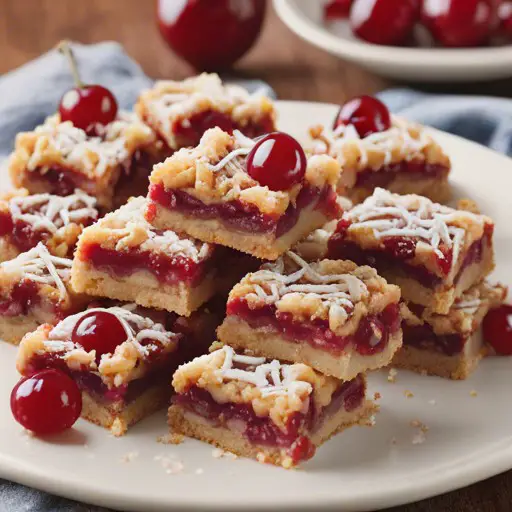
Heavenly Cherry Bars: Perfect for Feeding a Crowd
Are you in search of a delightful dessert recipe that’s perfect for sharing with family and friends? Look no further than these heavenly Cherry Bars, designed specifically to satisfy even the largest of crowds. Bursting with the sweet tartness of cherry pie filling and topped with a luscious glaze, these bars are sure to become a favorite at gatherings and celebrations. So, let’s roll up our sleeves and embark on a baking adventure that promises to delight taste buds and warm hearts!
Ingredients
For the Bars:
- 1 1/2 cups butter, softened
- 3 cups granulated sugar
- 1 1/2 teaspoons salt
- 5 large eggs
- 1 1/2 teaspoons vanilla extract
- 1 1/2 teaspoons almond extract
- 5 1/2 cups all-purpose flour
- 1 1/2 teaspoons baking powder
- 2 cans (21 oz. each) cherry pie filling
For the Glaze:
- 1 cup confectioner’s sugar
- 3 tablespoons milk
Instructions
Preparing the Bars:
- Preheat your oven to 350°F (175°C). Grease a large baking sheet or line it with parchment paper for easy cleanup.
- In a large mixing bowl, cream together the softened butter, granulated sugar, and salt until light and fluffy.
- Add the eggs, one at a time, beating well after each addition. Stir in the vanilla and almond extracts.
- In a separate bowl, whisk together the all-purpose flour and baking powder. Gradually add the dry ingredients to the wet ingredients, mixing until a smooth dough forms.
- Divide the dough in half. Press one half evenly into the prepared baking sheet, covering the bottom in a thin layer.
- Spread the cherry pie filling over the dough in an even layer, leaving a small border around the edges.
- Crumble the remaining dough over the cherry filling, creating a streusel-like topping.
Baking the Bars:
- Place the baking sheet in the preheated oven and bake for 45-50 minutes, or until the top is golden brown and the edges are slightly crisp.
- Remove the bars from the oven and allow them to cool completely in the pan on a wire rack.
Making the Glaze:
- In a small bowl, whisk together the confectioner’s sugar and milk until smooth and pourable.
- Drizzle the glaze over the cooled cherry bars in a zigzag pattern.
Cook Notes and Variations
- Nutty Crunch: Add chopped nuts, such as almonds or pecans, to the streusel topping for added texture and flavor.
- Citrus Twist: Enhance the flavor of the glaze by adding a splash of lemon juice or a sprinkle of lemon zest.
- Mixed Berry Variation: Swap out the cherry pie filling for your favorite berry filling, such as blueberry or raspberry, for a delicious twist on this recipe.
- Chocolate Drizzle: For chocolate lovers, melt some chocolate chips and drizzle it over the cooled bars along with or instead of the glaze.
Keto and Low-Carb Versions
Keto Version:
- Replace the granulated sugar with a keto-friendly sweetener like erythritol or stevia.
- Use almond flour or coconut flour instead of all-purpose flour to reduce the carb content.
- Opt for a sugar-free cherry pie filling or make your own using fresh or frozen cherries and a keto-friendly sweetener.
Low-Carb Version:
- Reduce the amount of granulated sugar or replace it with a low-carb sweetener like monk fruit.
- Use almond flour or coconut flour instead of all-purpose flour to lower the carb count.
- Choose a sugar-free cherry pie filling or make your own using fresh or frozen cherries and a low-carb sweetener.
In conclusion, these Cherry Bars for a Crowd are a true testament to the joy of sharing delicious treats with loved ones. With their buttery crust, fruity filling, and sweet glaze, they’re guaranteed to leave a lasting impression on everyone who tries them. Whether you’re hosting a party, attending a potluck, or simply craving a homemade dessert, these bars are the perfect choice for any occasion. So, gather your ingredients, preheat your oven, and get ready to bake up a batch of pure bliss. Your taste buds – and your guests – will thank you!
Additional Tips and Tricks
- Storage: Store leftover cherry bars in an airtight container at room temperature for up to 3 days, or in the refrigerator for up to 1 week.
- Freezing: These bars freeze well. Wrap individual bars tightly in plastic wrap and place them in a freezer-safe container for up to 3 months. Thaw at room temperature before serving.
- Customization: Feel free to customize these bars to suit your preferences. Experiment with different fruit fillings, glaze flavors, and add-ins to create your own unique version of this recipe.
- Presentation: For an elegant touch, dust the cooled bars with powdered sugar before serving, or garnish them with fresh cherries or mint leaves for a pop of color.
With these additional tips and tricks, you’re well-equipped to bake up a batch of Cherry Bars that will dazzle your taste buds and delight your guests. So, don your apron, preheat your oven, and get ready to spread joy with every bite. Happy baking!