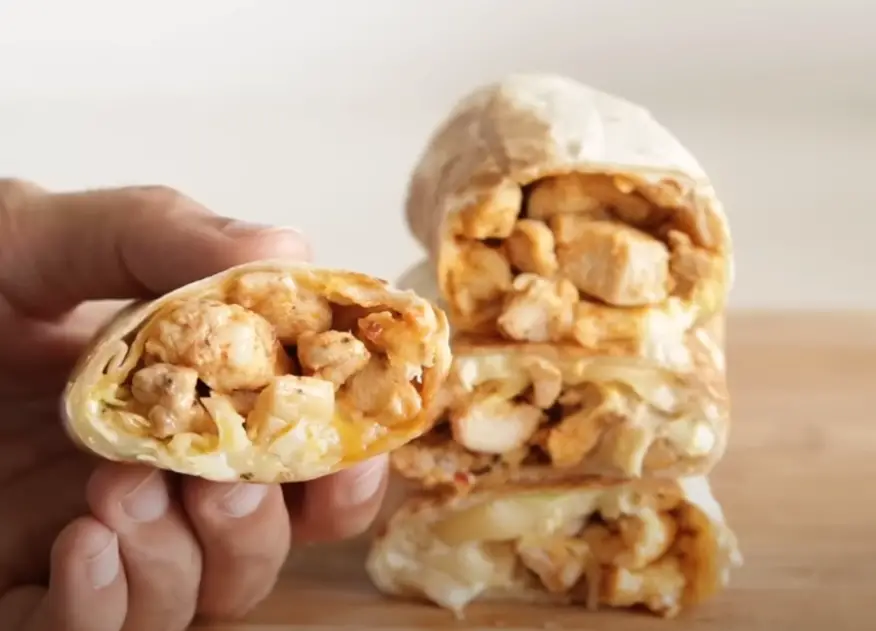
Cheesy Garlic Chicken Wraps are a delicious and versatile dish that combines the mouthwatering flavors of succulent chicken, rich cheese, and aromatic garlic all wrapped up in a warm tortilla. These wraps are perfect for a quick lunch, a satisfying dinner, or even a snack on the go. Whether you’re looking for a family-friendly meal or something to impress your guests, Cheesy Garlic Chicken Wraps are sure to be a hit. In this article, we’ll take you through everything you need to know about making these wraps, including the ingredients, steps, variations, tips, and answers to frequently asked questions.
Ingredients
To make the perfect Cheesy Garlic Chicken Wraps, you’ll need the following ingredients:
- Chicken Breasts: 2 medium-sized, boneless, and skinless chicken breasts, sliced into thin strips.
- Tortillas: 4 large flour tortillas or wraps of your choice.
- Cheese: 1 cup of shredded mozzarella or cheddar cheese (or a blend for extra flavor).
- Garlic: 4 cloves of garlic, minced finely.
- Butter: 2 tablespoons of unsalted butter.
- Olive Oil: 1 tablespoon of olive oil for sautéing.
- Salt and Pepper: To taste.
- Paprika: 1 teaspoon for added flavor.
- Italian Seasoning: 1 teaspoon (optional).
- Fresh Parsley: A handful, chopped, for garnish.
- Lettuce, Tomato, and Avocado: Optional for additional freshness and flavor.
Steps
- Prepare the Chicken: Start by seasoning the chicken strips with salt, pepper, paprika, and Italian seasoning. Mix well to ensure the chicken is evenly coated with the spices.
- Cook the Chicken: In a large skillet, heat the olive oil over medium-high heat. Add the seasoned chicken strips and cook until they are golden brown and cooked through, about 6-8 minutes. Remove the chicken from the skillet and set it aside.
- Make the Garlic Butter Sauce: In the same skillet, reduce the heat to medium and add the butter. Once the butter is melted, add the minced garlic and sauté for about 1-2 minutes until fragrant. Be careful not to burn the garlic as it can turn bitter.
- Combine Chicken and Sauce: Return the cooked chicken strips to the skillet, tossing them in the garlic butter sauce to coat evenly. Let the chicken soak up all the garlicky goodness for about 2-3 minutes.
- Assemble the Wraps: Lay a tortilla flat on a clean surface. Place a generous amount of the cheesy garlic chicken mixture in the center of the tortilla. Sprinkle a good handful of shredded cheese over the chicken. Add lettuce, tomato, and avocado slices if desired.
- Fold and Wrap: Fold the sides of the tortilla inwards, then roll it up tightly from the bottom to the top, securing all the fillings inside.
- Grill the Wraps: For an extra touch, heat a non-stick skillet or a grill pan over medium heat. Place the wrapped tortillas seam side down and cook for 2-3 minutes on each side until golden brown and crispy, and the cheese has melted inside.
- Serve: Cut the wraps in half diagonally and serve them hot, garnished with fresh parsley.
Variations
- Spicy Kick: Add some heat by incorporating diced jalapeños, chili flakes, or a splash of hot sauce to the chicken mixture.
- Veggie-Packed: Include more vegetables like bell peppers, onions, or spinach for added nutrition and flavor.
- Different Cheeses: Experiment with different cheeses such as pepper jack for a spicy twist or gouda for a smoky flavor.
- Low-Carb Option: Use lettuce leaves instead of tortillas to make a low-carb wrap.
- Mexican-Inspired: Add black beans, corn, and a sprinkle of taco seasoning for a Mexican flair.
Tips
- Chicken Preparation: Make sure to cut the chicken into uniform strips so they cook evenly.
- Cheese Choice: Use a cheese that melts well, such as mozzarella or cheddar, for that ooey-gooey texture.
- Perfect Sear: Avoid overcrowding the pan when cooking the chicken to ensure a good sear and prevent steaming.
- Serving: These wraps are best served hot, but they can also be enjoyed cold, making them perfect for meal prep.
- Storage: If you have leftovers, store the cooked chicken separately from the tortillas to avoid sogginess. Reheat the chicken before assembling the wraps.
Cheesy Garlic Chicken Wraps are a delightful and versatile meal option that can be customized to suit your tastes. With a few simple ingredients and easy steps, you can create a delicious wrap that’s perfect for any occasion. Whether you’re looking for a quick lunch, an easy dinner, or a tasty snack, these wraps will not disappoint. Experiment with different variations, and make them your own by adding your favorite ingredients. With this guide, you’re well on your way to making the perfect Cheesy Garlic Chicken Wraps every time.
Frequently Asked Questions (FAQs)
Q: Can I use other types of meat?
A: Yes, you can substitute the chicken with turkey, beef, or even shrimp. Adjust the cooking time accordingly to ensure the meat is fully cooked.
Q: How can I make this recipe healthier?
A: Use whole wheat tortillas, reduce the amount of cheese, and add more vegetables to increase the nutritional value.
Q: Can these wraps be made ahead of time?
A: Yes, you can prepare the chicken filling in advance and store it in the refrigerator for up to 3 days. Assemble and grill the wraps just before serving for the best texture.
Q: What can I serve with Cheesy Garlic Chicken Wraps?
A: These wraps pair well with a side salad, fries, or a light soup. For a complete meal, add a side of roasted vegetables or a fresh fruit platter.
Q: Can I freeze these wraps?
A: It’s best to freeze the cooked chicken filling separately. Thaw and reheat the chicken before assembling the wraps, as freezing the tortillas can affect their texture.
Cheesy Garlic Chicken Wraps are a wonderful addition to your recipe collection. They’re easy to make, full of flavor, and can be adapted to suit your personal preferences. Try them out today and enjoy the delicious combination of cheesy, garlicky goodness wrapped up in a warm, satisfying tortilla!