BAKED SWEET AND SOUR CHICKEN
Introduction
If you’re craving a delicious and flavorful dish that combines the perfect balance of sweet and sour flavors, then look no further than baked sweet and sour chicken. This recipe takes a classic Chinese takeout favorite and transforms it into a healthier, homemade version that is just as tasty. Baking the chicken instead of frying it not only reduces the amount of oil used but also creates a crispy and flavorful coating that is hard to resist. With a few simple ingredients and some easy steps, you can whip up this crowd-pleasing dish in no time.
Ingredients
- 2 pounds boneless, skinless chicken breasts, cut into bite-sized pieces
- 1 cup cornstarch
- 1/2 teaspoon salt
- 1/4 teaspoon black pepper
- 2 eggs, beaten
- 1/4 cup vegetable oil
- 1 cup pineapple chunks
- 1 bell pepper, cut into chunks
- 1 onion, cut into chunks
- 1 cup ketchup
- 1/2 cup apple cider vinegar
- 1/4 cup brown sugar
- 2 tablespoons soy sauce
- 1 tablespoon cornstarch
- 1/4 cup water
Steps
Step 1: Preparing the Chicken
Preheat your oven to 400°F (200°C) and lightly grease a baking dish. In a large bowl, combine the cornstarch, salt, and black pepper. Dip each piece of chicken into the beaten eggs, then coat it in the cornstarch mixture. Place the coated chicken pieces onto the greased baking dish.
Step 2: Baking the Chicken
Drizzle the vegetable oil over the coated chicken pieces in the baking dish. Bake for 25-30 minutes or until the chicken is cooked through and the coating is crispy and golden brown.
Step 3: Making the Sweet and Sour Sauce
In a saucepan, combine the ketchup, apple cider vinegar, brown sugar, and soy sauce. In a small bowl, whisk together the cornstarch and water until smooth. Add the cornstarch mixture to the saucepan and stir well. Bring the mixture to a boil over medium heat, stirring constantly. Cook for an additional 2-3 minutes until the sauce has thickened.
Step 4: Assembling the Dish
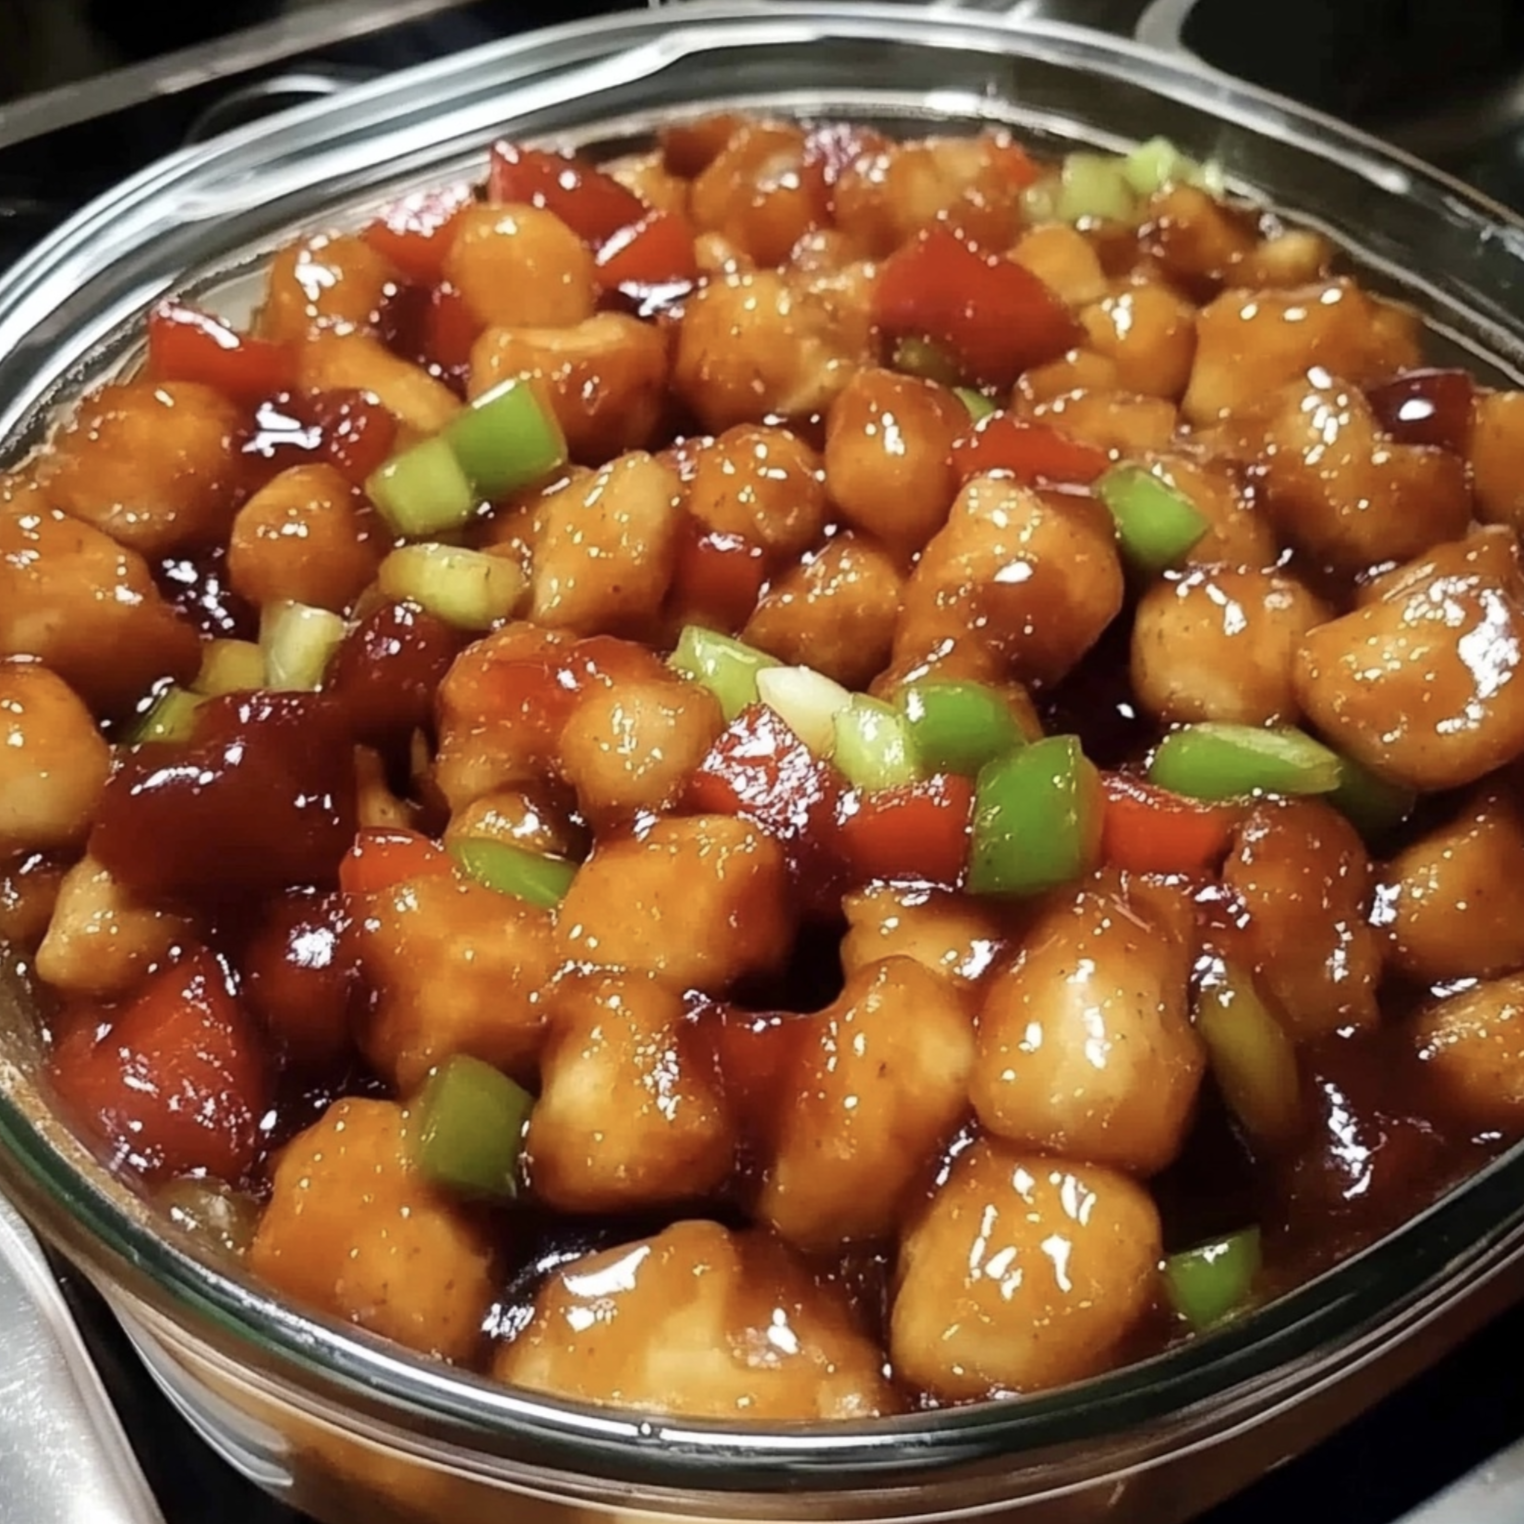
Once the chicken is baked, remove it from the oven and place it in a large bowl. Add the pineapple chunks, bell pepper, and onion. Pour the sweet and sour sauce over the chicken and vegetables. Gently toss everything together until well coated.
Step 5: Finishing Touches
Transfer the chicken and vegetable mixture back into the baking dish. Place it back in the oven and bake for an additional 10-15 minutes, or until the sauce is bubbly and the vegetables are tender-crisp.
Variations
This recipe can be easily customized to suit your taste preferences. Here are a few variations you can try:
- For a spicier kick, add some crushed red pepper flakes or a dash of hot sauce to the sweet and sour sauce.
- Add your favorite vegetables to the dish. Broccoli, carrots, or snap peas would all be delicious additions.
- For a vegetarian version, substitute the chicken with tofu or tempeh.
- For a gluten-free option, use gluten-free soy sauce and replace the cornstarch with arrowroot powder or gluten-free flour.
Tips
- Make sure to cut the chicken into bite-sized pieces to ensure even cooking.
- For an extra crispy coating, you can use panko breadcrumbs instead of cornstarch.
- If you prefer a sweeter sauce, increase the amount of brown sugar in the sweet and sour sauce.
- Feel free to adjust the amount of vegetables to your liking.
- Serve the baked sweet and sour chicken over steamed rice or noodles for a complete meal.
Conclusion
Baked sweet and sour chicken is a delicious and healthier alternative to the classic takeout version. With its crispy coating, tender chicken, and flavorful sauce, it’s a dish that will wow your taste buds. Plus, with the added bonus of being baked instead of fried, you can enjoy this homemade favorite guilt-free. So, gather your ingredients, follow the simple steps, and treat yourself to a mouthwatering meal that will satisfy your sweet and sour cravings.
FAQs
1. Can I use chicken thighs instead of chicken breasts?
Yes, you can use chicken thighs if you prefer. Just make sure to adjust the cooking time accordingly, as thighs may take longer to cook than breasts.
2. Can I make this recipe ahead of time?
While the chicken may not stay as crispy when reheated, you can certainly prepare the sweet and sour sauce and chop the vegetables ahead of time to save some prep time.
3. Can I freeze the baked sweet and sour chicken?
It’s best to enjoy this dish fresh, as the texture of the chicken may change after freezing and reheating. However, you can freeze the sauce separately and use it later with freshly baked chicken.
4. Can I use store-bought sweet and sour sauce instead?
While store-bought sweet and sour sauce can be used in a pinch, making your own sauce from scratch will give you a fresher and more flavorful result.
5. Can I add more vegetables to the dish?
Absolutely! Feel free to add more vegetables or swap them out for your favorites. Just make sure to adjust the cooking time accordingly to ensure the vegetables are cooked to your desired level of tenderness.