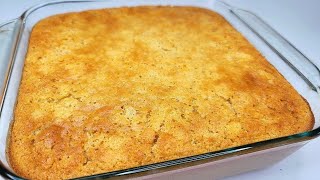
Strawberry Cheesecake Dump Cake: A Deliciously Easy Dessert
Introduction
When it comes to desserts, there’s nothing quite like a homemade Strawberry Cheesecake Dump Cake. This mouthwatering treat combines the creamy goodness of cheesecake with the sweet and tangy flavors of fresh strawberries. The best part? It’s incredibly easy to make, requiring just a few simple ingredients and minimal effort. Whether you’re a seasoned baker or a novice in the kitchen, this recipe is sure to satisfy your sweet tooth and impress your family and friends. So, let’s dive in and learn how to create this delectable dessert!
Ingredients
For the cake:
- 1 box of yellow cake mix
- 1/2 cup (1 stick) unsalted butter, melted
- 3 cups fresh strawberries, hulled and sliced
- 1 cup granulated sugar
- 1 tablespoon cornstarch
- 1/2 cup water
For the cheesecake layer:
- 1 package (8 oz) cream cheese, softened
- 1/2 cup powdered sugar
- 1 teaspoon vanilla extract
Steps
Step 1: Preheat and prepare
Preheat your oven to 350°F (175°C). Grease a 9×13-inch baking dish with butter or cooking spray to prevent sticking.
Step 2: Make the strawberry filling
In a medium saucepan, combine the sliced strawberries, granulated sugar, cornstarch, and water. Cook over medium heat, stirring occasionally, until the mixture thickens and the strawberries soften. This should take about 5-7 minutes. Remove from heat and set aside.
Step 3: Prepare the cheesecake layer
In a mixing bowl, beat the softened cream cheese, powdered sugar, and vanilla extract until smooth and creamy. Set aside.
Step 4: Assemble the cake
Pour the melted butter into the prepared baking dish. Sprinkle the yellow cake mix evenly over the butter, ensuring it covers the entire surface. Do not mix.
Spoon dollops of the cream cheese mixture on top of the cake mix, spreading them out as evenly as possible. Again, do not mix.
Finally, pour the strawberry filling over the cream cheese layer. Spread it out gently to cover the entire surface.
Step 5: Bake and serve
Place the baking dish in the preheated oven and bake for 40-45 minutes, or until the cake is golden brown and the strawberry filling is bubbling around the edges.
Remove from the oven and let it cool for a few minutes before serving. You can enjoy it warm, at room temperature, or chilled, depending on your preference.
Variations
This recipe is incredibly versatile, allowing you to customize it to your liking. Here are a few variations you can try:
1. Blueberry Cheesecake Dump Cake:
Swap the strawberries for fresh or frozen blueberries and follow the same steps. The result will be a delightful blueberry cheesecake version of this dump cake.
2. Mixed Berry Dump Cake:
Combine a variety of berries like strawberries, blueberries, raspberries, and blackberries for a colorful and flavorful twist. Adjust the sugar and cornstarch quantities accordingly.
3. Chocolate Strawberry Cheesecake Dump Cake:
Add a layer of chocolate chips or chocolate chunks between the cream cheese and strawberry filling for a decadent chocolatey kick.
Tips
Here are a few tips to ensure your Strawberry Cheesecake Dump Cake turns out perfect every time:
1. Use fresh strawberries:
Fresh strawberries will provide the best flavor and texture for this cake. However, you can use frozen strawberries if fresh ones are not available. Just make sure to thaw them before cooking.
2. Don’t overmix:
When assembling the layers, resist the temptation to mix them together. The distinct layers are what make this dump cake so visually appealing and delicious.
3. Serve with whipped cream or ice cream:
Enhance the dessert’s creaminess by serving it with a dollop of whipped cream or a scoop of vanilla ice cream. The contrast of temperatures and textures will elevate the overall experience.
Conclusion
Strawberry Cheesecake Dump Cake is a dessert that never fails to impress. With its luscious layers of creamy cheesecake, sweet strawberry filling, and golden cake mix, it’s a treat that will leave everyone craving for more. Best of all, it’s incredibly easy to make, making it perfect for both novice and experienced bakers. So, next time you’re in the mood for a delightful dessert, give this recipe a try. Your taste buds will thank you!
FAQs
1. Can I use a different cake mix flavor?
Absolutely! While this recipe calls for a yellow cake mix, you can experiment with other flavors like white, chocolate, or even lemon. Just keep in mind that it may slightly alter the overall taste of the cake.
2. Can I use frozen strawberries?
Yes, you can use frozen strawberries if fresh ones are not available. Just make sure to thaw them before cooking and adjust the cooking time accordingly.
3. Can I make this cake in advance?
Yes, you can make this cake a day in advance and store it in the refrigerator. However, for the best texture and flavor, it’s recommended to serve it within 2-3 days.
4. Can I freeze leftovers?
Yes, you can freeze any leftover cake for up to 3 months. Just make sure to wrap it tightly in plastic wrap or store it in an airtight container to prevent freezer burn.
5. Can I use a different fruit filling?
Absolutely! While this recipe calls for strawberries, you can use other fruits like peaches, cherries, or even apples. Just adjust the sugar and cornstarch quantities accordingly to ensure the filling thickens properly.


