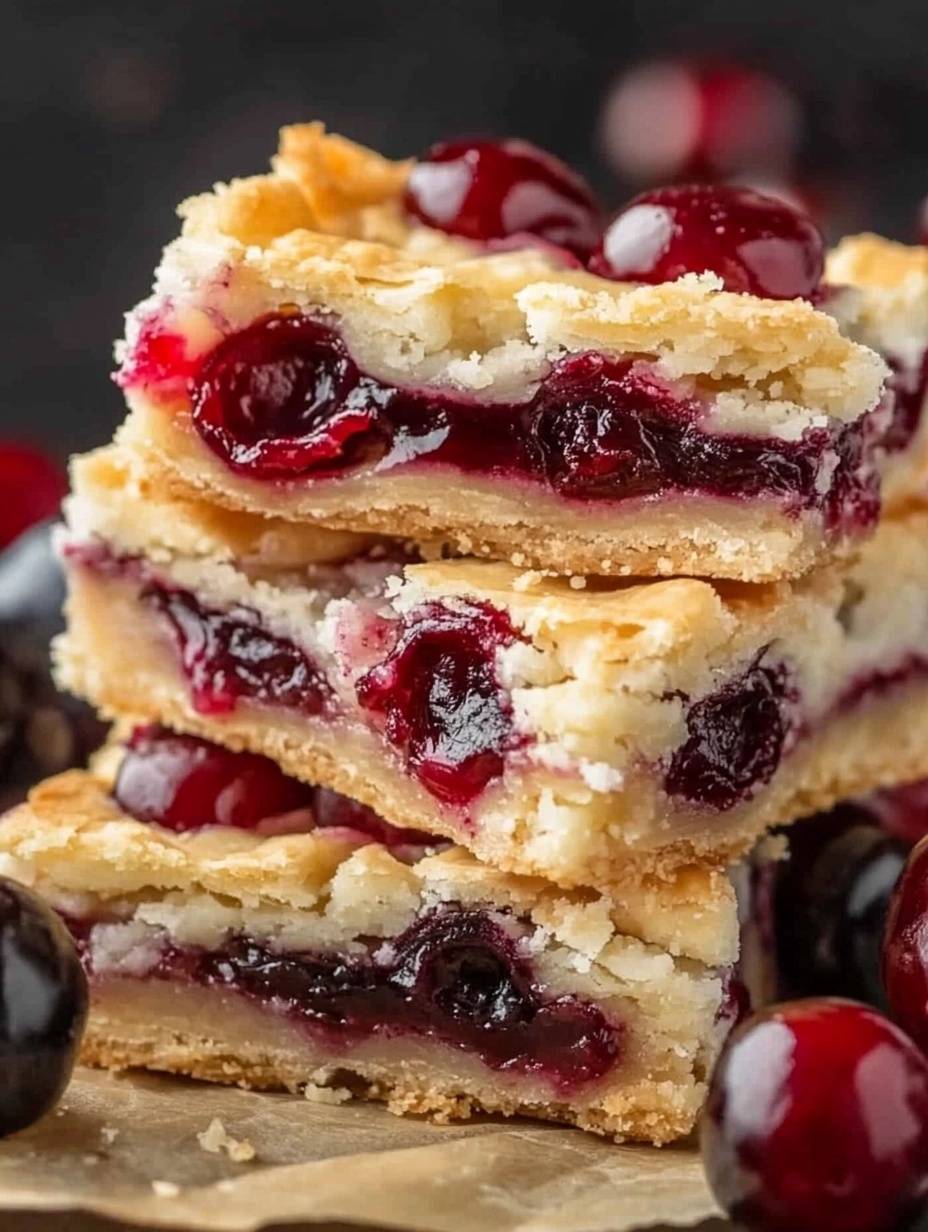
If you’re a fan of cherry pie but want something a little easier to prepare, cherry pie bars are the perfect solution. With their buttery crust, sweet-tart cherry filling, and irresistible glaze, these bars pack all the flavors of a classic pie in a handheld, crowd-pleasing dessert. They’re great for family gatherings, potlucks, or just an afternoon treat at home. The best part? They’re super simple to make and deliver that nostalgic, homemade pie taste without all the fuss of rolling out dough.
Ingredients
For the Crust and Topping:
1 cup (2 sticks) unsalted butter, softened
1 3/4 cups granulated sugar
4 large eggs
1 1/2 teaspoons vanilla extract
1/4 teaspoon almond extract (optional, but highly recommended for cherry lovers)
3 cups all-purpose flour
1 teaspoon baking powder
1/2 teaspoon salt
For the Cherry Filling:
2 cans (21 ounces each) cherry pie filling
1 teaspoon almond extract (optional, for an extra flavor boost)
For the Glaze:
1 cup powdered sugar
2 tablespoons milk (or more, if needed)
1/2 teaspoon vanilla or almond extract
Step-by-Step Instructions
Step 1: Preheat and Prepare
Start by preheating your oven to 350°F (175°C). Grease a 9×13-inch baking pan or line it with parchment paper for easy removal later.
Step 2: Make the Crust and Topping
1. In a large mixing bowl, beat the softened butter and sugar together until light and fluffy. This will take about 2–3 minutes.
2. Add the eggs one at a time, beating well after each addition. Stir in the vanilla extract and almond extract (if using).
3. In a separate bowl, whisk together the flour, baking powder, and salt. Gradually mix the dry ingredients into the wet ingredients until just combined.
Step 3: Assemble the Bars
1. Spread about two-thirds of the dough evenly into the prepared pan. This will form the base of your cherry pie bars.
2. In a small bowl, mix the cherry pie filling with almond extract for enhanced flavor. Spread the cherry filling evenly over the dough base.
3. Drop spoonfuls of the remaining dough over the cherry filling. Don’t worry about covering it completely – the gaps will give the bars a rustic and charming look when baked.
Step 4: Bake to Perfection
Bake the assembled bars in the preheated oven for 35–40 minutes, or until the top is golden brown and the cherry filling is bubbling. Once done, let the bars cool completely in the pan.
Step 5: Prepare the Glaze
While the bars are cooling, whisk together the powdered sugar, milk, and vanilla or almond extract in a small bowl. The glaze should be smooth and drizzle-worthy. If it’s too thick, add a little more milk, one teaspoon at a time, until you reach the desired consistency.
Step 6: Glaze and Serve
Once the bars are completely cool, drizzle the glaze over the top. Let it set for a few minutes before cutting the dessert into squares or rectangles. Serve and watch them disappear!
Tips for the Perfect Cherry Pie Bars
1. Choose Quality Cherry Filling: A good-quality cherry pie filling makes a world of difference. You can even use homemade filling for a personal touch.
2. Add Almond Extract: If you’re a fan of cherries, don’t skip the almond extract – it elevates the flavor to new heights.
3. Let the Bars Cool Completely: Cooling is essential for easy slicing and for the flavors to meld together.
4. Storage: Store leftovers in an airtight container at room temperature for up to 2 days, or in the fridge for up to a week.
Cherry pie bars are the ultimate dessert for any occasion. They’re easy to make, incredibly delicious, and deliver that classic cherry pie flavor in a fun and portable form. Whether you’re baking them for a party, a holiday gathering, or just to satisfy your sweet tooth, these bars are guaranteed to be a hit. Pair them with a scoop of vanilla ice cream or a dollop of whipped cream, and you’ve got yourself a dessert worth savoring.


